Steve Heaton Lunch Reception on Canon T2i from Lars Lindstrom on Vimeo.
Lars Lindstrom's Video Blog
Tuesday, July 20, 2010
Thursday, July 15, 2010
DLSR Homemade Rig


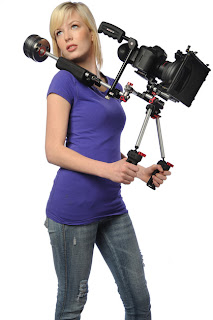
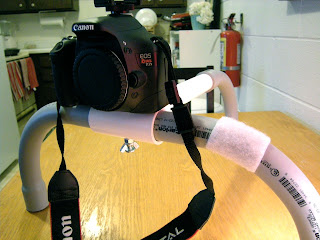
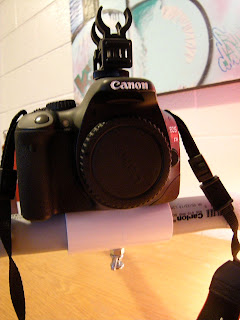
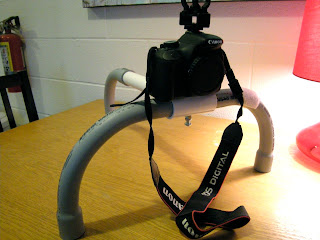
So I went to Home Depot a couple of weeks ago and bought some materials for this idea I had of making my own DSLR rig. I knew of course that it wouldn't look nearly as cool as the fancy Zacuto material, but it all goes back to that little thing you and i refer to as cash in hand... I don't have $3000 to spend on a fancy Zacuto rig. But I do have $9.35 to spend on PVC and hardware that would piece together my DLSR rig! It's a three stop shop. hardware, electrical, and plumbing, then you're done! I think i'm going to post a video of how to make it later so that you can see everything step by step... but the fact that i only have like 6 people following this blog makes me hesitate to spend much time on it... especially when half of you are only here for pity, and the other half already know how i made my rig because i've shown it to you like a hundred times already. thats besides the point, here we go
As you can see, i put a piece of heavy duty velcro on one of the arms to attach my audio rig to. other than that, she's a bit ugly, but man is she steady!
Labels:
Canon,
canon T2i,
DIY,
DSLR,
Final Cut Studio,
How to Video,
Lars Lindstrom,
steadicam,
steady shot,
Zacuto
Monday, July 5, 2010
Sunday, June 27, 2010
Wednesday, June 23, 2010
How to conform your footage to the proper frame rate
My last project was shot at 60 frames per second, or twice the rate of the standard broadcast rate (29.97). This is done in order to slow down the footage in the post production stage to give it a dramatic cinematic effect. There are two ways of achieving this in the post production phase... a good way, and a not so good way. Let's start with the not so good way. You could capture all of your clips into final cut pro and drag them into your timeline and then manually change the speed to 50%... half the speed (60 frames to 30). Although this technically will play out at the same speed, it will not have the constant fluidity that changing the frame rate will give it. Alright... the good way. The good way is only possible with a program called Cinema Tools that comes bundled in the Final Cut Studio package, so for those FC Express folks, the not so good way will have to do for now. Right click on the clips that you want to conform to 30 frames, and open them with Cinema Tools (Cinema Tools will only allow up to 20 movie clips to be open at one time). Simply click the conform button and tell it to conform to 29.97 frames to be exactly half the speed of the original video. You may also conform the clip to 24 frames if you are mixing it with other 24 frame footage or prefer the stroby look, just note that it will play back even slower than half speed. Now wherever you open the clip, it will play at the new frame rate... Done!
Tuesday, June 22, 2010
Wedding Video Using T2i at 60 FPS
Wedding Video on T2i from Lars Lindstrom on Vimeo.
Labels:
16-35mm,
Canon,
canon T2i,
Lars Lindstrom,
lenses,
T2i,
Wedding Video
Monday, June 21, 2010
T2i vs RED
I recently purchased a Canon T2i and a 50mm 1.8 lens for about $900 and I can already tell that this is going to change the way we film things from now on. The T2i has the same image sensor size as the infamous RED cinema camera causing it to pick up incredible amounts of detail in color and in depth of field. The main features that differ the HD SLR from the Red camera is the Raw recording capabilities and the pixel count (4k vs 1k). But perhaps the biggest difference between the T2i and the RED is the price... $900 vs the $17500 for the RED body and another $20000 for the 5 RED lenses... not to mention the thousands more for the necessary accessories needed to mount your camera. In other words $1000 vs $40000... I can sacrifice raw for that kind of a difference... What about you? Lets hear what you think
Labels:
50mm 1.8,
5D,
5D Mark II,
Canon,
cost comparison,
Lars Lindstrom,
lenses,
Low Light,
Nifty Fifty,
RED Cinema,
T2i
Subscribe to:
Posts (Atom)


